10 PPT Activities for Online Teaching — 10 Shoot the Balloons
This post covers the Shoot the Balloons activity from the 10 PPT Activities for Online Teaching series — click a balloon to pop it, with answer choices or vocabulary written on each one for a fun interactive Q&A.
Before diving in, I’d recommend reading the first post in this series, which covers the goals and key considerations for online teaching activities.
For all online teaching activity resources, visit the Online Teaching Resource Hub — interactive PowerPoints, Google tools, useful apps, and more.
What This Activity Is For
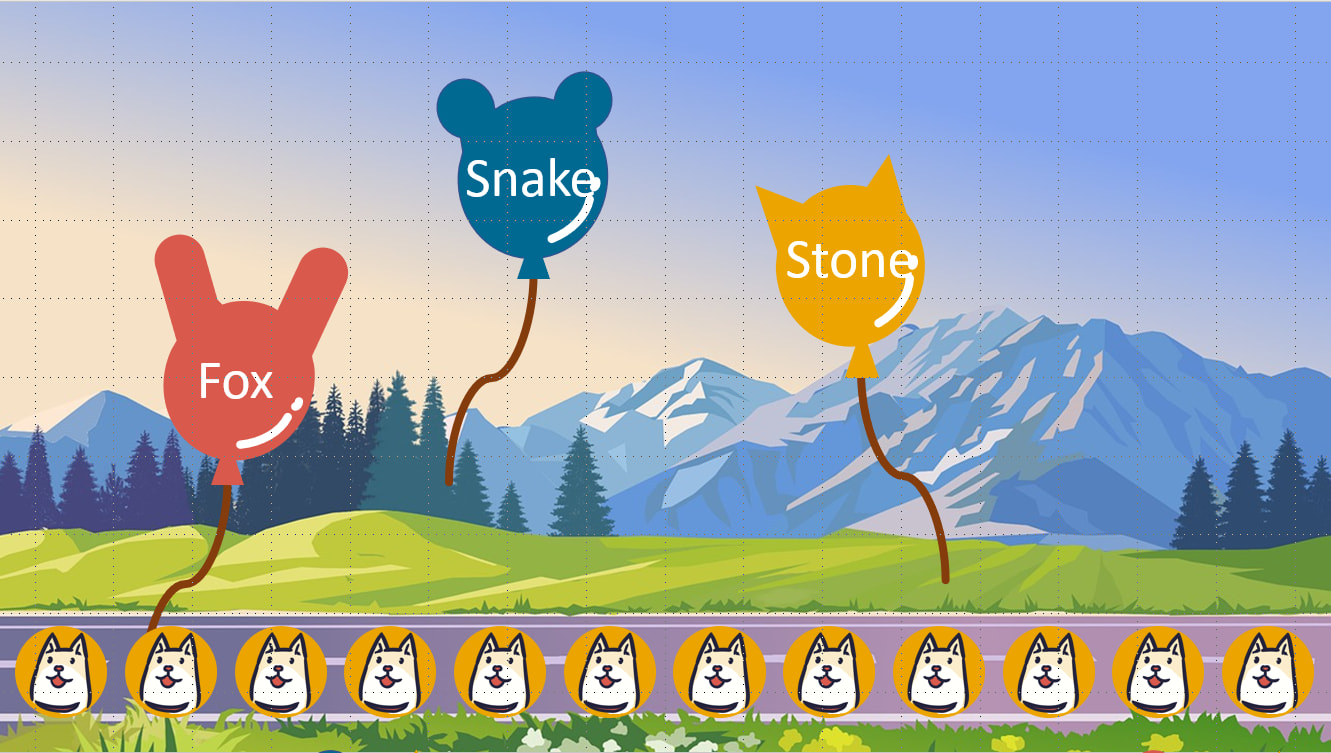
Shoot the Balloons is usually just a standalone mini-game, but add answer choices onto the balloons and it becomes a fun interactive classroom activity :)
I originally learned this technique from PPT Animation Course | Dynamic Presentations Made Easy — worth checking out if you’re interested!
How it works:
- Click the mouse and a balloon floats upward
- Click the balloon and it pops — the dog icon below shows the score
Instructions below show you how to customize the template (click here to download — if it won’t open after downloading, see this troubleshooting guide).
Requirements:
Software: PowerPoint 2019 (this activity is compatible with older versions of PowerPoint — feel free to leave a comment if you run into issues)
Using the Template: Shoot the Balloons in PPT
Download the file below first (if it won’t open, see this guide):
Template_Shoot the Balloons Download
Once you’re in the file, open the Selection Pane first (click here for instructions — go to Home → Select → Selection Pane).
Use the Selection Pane to hide elements you don’t need to edit at the moment.
What you can customize:
- Score01–12: delete all of them if you don’t want a score display
- Text on the X balloon (“X balloon text”): double-click to delete
- Balloon movement speed: select all animations, then change the animation duration to a longer or shorter value
- Balloon movement order [Advanced — don’t touch unless you understand what you’re doing]
When you’re done editing, make sure all elements in the Selection Pane are set to visible. That’s it!
Hope this is helpful!
I’ve hit a bit of a wall for new ideas, so this series is pausing here for now XD If you have suggestions for activities you’d love to see, leave a comment — it’ll give me the motivation to keep going (maybe).
If you have any questions, or there’s something specific you’d like to learn, feel free to leave a comment anytime!
For all PowerPoint activities in the online teaching series, see the latest post in the series.
Thanks again — wishing everyone smooth and enjoyable online teaching!
Thanks for reading :D
If you enjoyed this post, feel free to click the coffee button in the lower right to support us and give Lottery a can 🐾
Comments