Google Tools for Teachers (3): FormLimiter — Set a Time Limit on Google Forms Quizzes
This post walks through how to use the FormLimiter add-on for Google Forms to set a quiz deadline and automatically close the form, ensuring students complete the test within the allotted time and reducing the risk of answer-sharing.
For all online teaching activity content, visit the Online Teaching Resource Hub, which includes all interactive PowerPoint templates, Google tools, and other useful resources.
Google Forms Add-on: Timer+Proctor
Online quizzes (see here for how to build one) are incredibly convenient — but a lot of teachers ask: is there any way to prevent questions from leaking? Can we do anything about cheating?
Beyond tweaking the form’s built-in settings, we can also use add-ons as an extra layer of protection.
Of course, these measures stop the honest-but-careless, not the truly determined cheater — but having some protection is better than none.
There are quite a few Google Forms add-ons out there. Today I’m covering FormLimiter. Another good one is Timer+Proctor, which integrates with Google Classroom — but its free tier only allows 50 quizzes, so I’m introducing FormLimiter instead, since it has no such cap.
Layer 1: Google Forms’ Built-in Settings
The first layer of protection comes from the form’s own settings. Click the gear icon in the upper right to get started.
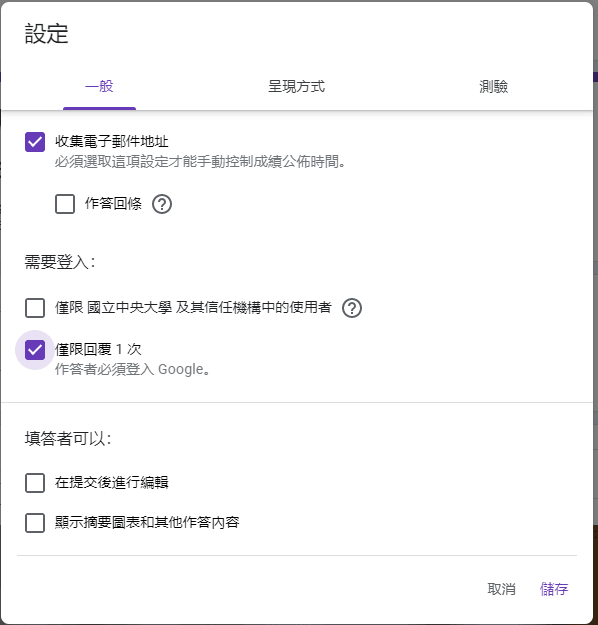
Settings: General
Configure it as shown below. This limits each student to one submission and prevents them from editing their answers after submitting.
Note that this will require students to be signed into a Google account.
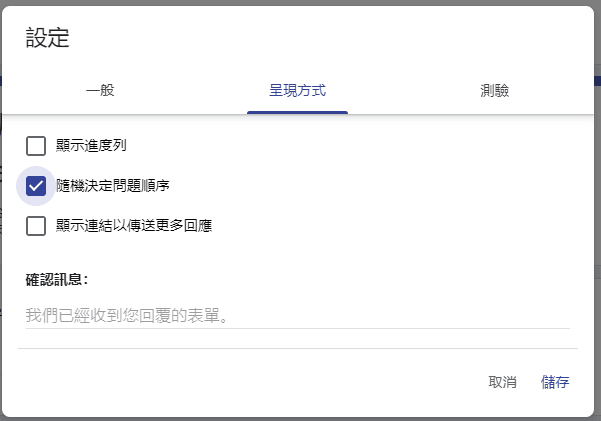
Settings: Presentation
A few options to consider here:
- Show progress bar: up to you
- Shuffle question order: if you want maximum protection, you can enable this — but keep in mind it will shuffle everything, including any name fields, so think it through first
- Show link to submit another response: turn this off so only the people you’ve sent the link to can access the quiz
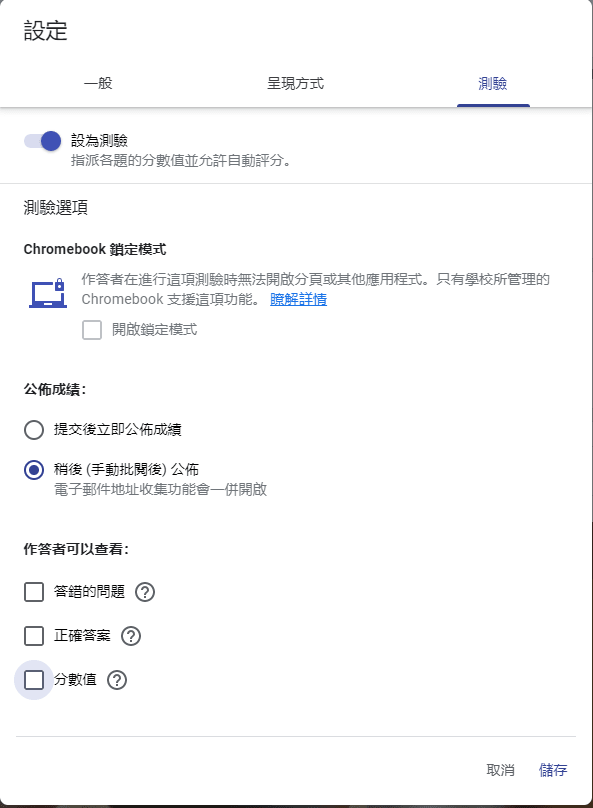
Settings: Quizzes
The gold standard is “Chromebook locked mode,” but that’s rarely available. Here are the key options to pay attention to:
- Release grade: Later, after manual review — the form can still auto-grade some questions, but results won’t be sent until you’ve confirmed everything looks good. Students also won’t know their results ahead of time.
- Missed questions: don’t check
- Correct answers: don’t check
- Point values: optional, but I’d recommend leaving it unchecked for now
At this point, you’ve ensured that:
- Students won’t see their scores immediately
- Students can’t use question numbers to tip each other off about answers
- Students can only submit once
- Students won’t know which answers were right or wrong
If you need additional protection, continue to the next step.
Layer 2: Google Forms Add-on — FormLimiter
Step 01: Install FormLimiter
With your form open, click the three dots in the upper right and select Add-ons.
You’ll find plenty of useful add-ons in there — today we’re installing FormLimiter.
Select your account, read through the permissions, and click through to install if you’re comfortable.
Step 02: Configure FormLimiter
After closing the installation window, go back to your form and press F5 to refresh the page.
You’ll notice a new puzzle-piece icon has appeared in the upper right — that’s the add-ons menu.
Click it, then select formLimiter – PROD, then Set limit.
A panel will appear in the lower right where you can configure your settings.
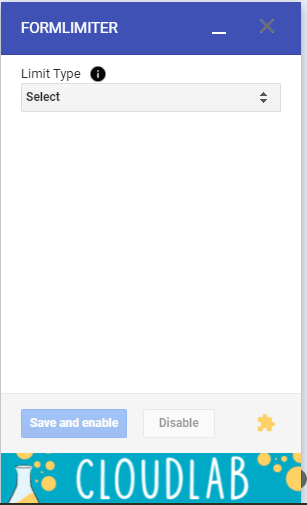
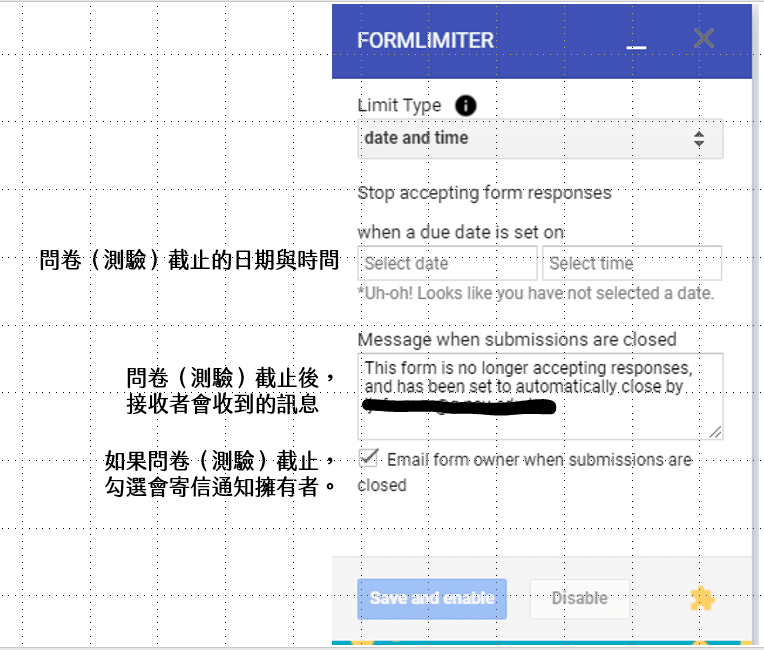
The Limit Type offers two options:
date and time
This is the one you’ll almost always use for quizzes. Set a date and time, and optionally customize the message students see if they try to access the form after it closes.
Think about how much time students need — for example, if I want the last ten minutes of class to be a quiz and class ends at 12:00, I might set the deadline to 12:05 (building in a little buffer).
Don’t forget to click Save and Enable for the settings to take effect.
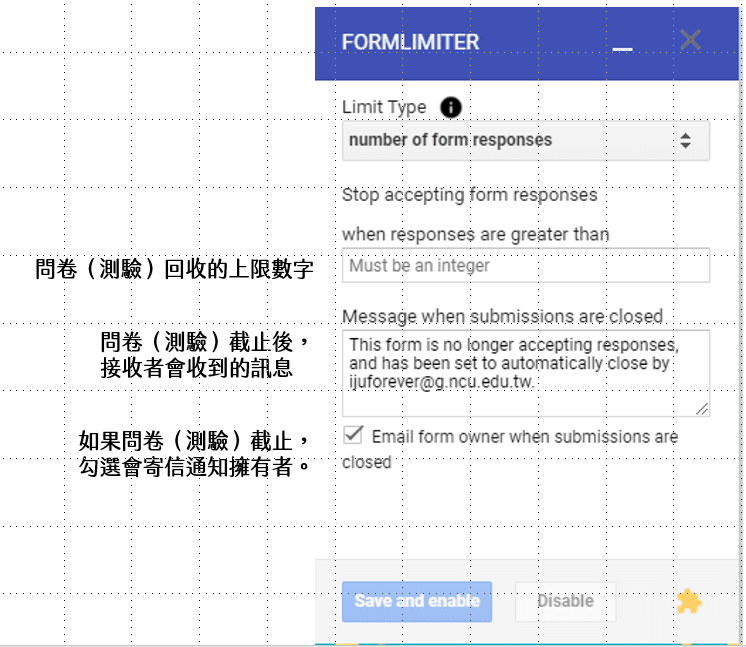
number of form responses
This option is better suited for surveys than quizzes, but worth knowing about.
If you have 50 students and you don’t want anyone submitting from an alternate account, set the limit to 50. Once 50 responses are received, the form closes automatically.
Don’t forget to click Save and Enable here too.
Note: What Students See
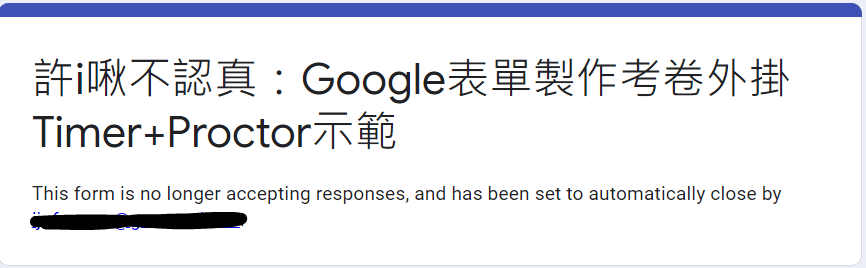
Let’s look at what the student experience actually looks like.
Whether a student tries to access the form after the deadline or started the form in time but submitted after the deadline, they’ll see the same screen.
So the time limit covers both scenarios. :D
Just make sure to include a reminder in the form itself telling students to submit on time!
Note: Security Concerns
Some people have asked whether the permissions FormLimiter requests are a security risk.
I can’t say there’s zero risk, since it does request quite a few permissions — but most of them seem necessary. Here’s a quick breakdown of what each permission is for:
[For enabling/disabling the form]
- View, edit, create, and delete all your Google Drive files
- View, edit, create, and delete all spreadsheets in your Google Drive
- View and manage your forms in Google Drive
[For running the add-on]
- Connect to an external service
- Allow this application to run when you are not present
- Display and run third-party web content in prompts and sidebars within Google applications
[For sending students the “form closed” message]
- Send email on your behalf
FormLimiter is essentially the most well-known add-on of its type, with 10,000,000+ users and a rating of around 4.1. And realistically, any add-on with these kinds of features will need these permissions.
That said, the first permission is quite broad. If you’re concerned about security, consider creating the form from a secondary Google account — that way, the impact is minimal.
I hope this walkthrough was helpful for everyone!
If you have any questions, or there’s an activity you’d like to learn about, feel free to leave a comment anytime.
For all PowerPoint-based online teaching activities, see:

10 PPT Activities for Online Teaching (13): Lottery Adventure RPG
Iju Hsu · 2021/06/28 · 12 comments
This post covers the “Lottery Adventure RPG” from the 10 PPT Activities series — a pixel-art style adventure game woven into course content that gives students the feeling of clearing stages.

10 PPT Activities for Online Teaching (12): Snakes and Ladders (with myViewBoard)
Iju Hsu · 2021/06/24 · 5 comments
This post covers “Snakes and Ladders” from the 10 PPT Activities series — combining slides with myViewBoard, it’s a great group competition activity made more exciting by the element of chance.
Thanks again everyone — wishing you smooth sailing with online teaching!
Thanks for reading :D
If you enjoyed this post, feel free to click the coffee button in the lower right to support us and give Lottery a can 🐾
Comments