Podcast Editing: One-Click Audio Processing with Audacity
A walkthrough of how I use the free audio editor Audacity to do initial processing on podcast audio files — including creating a podcast template to save editing time and setting up a macro chain for quick audio cleanup.
This post walks through how I use the free audio editor Audacity to do initial processing on podcast audio files — covering how to create a podcast template to save editing time, and how to set up a macro chain for one-click audio cleanup.
If you’re curious about how I plan and prepare podcast content, check out this post: Podcast Prep: From Research to Episode Titles, Using “Language Playground” as a Case Study
Up until recently, my role in podcasting was mainly focused on content prep. But when I started collaborating with Yijing on 大人的漫畫社 (Kidult Comic Club), I started handling audio editing too. XD
Audio editing is genuinely a deep craft, and what I’m sharing here is just my personal workflow for editing 大人的漫畫社 — built up from reading a lot of other people’s advice and adapting it over time. There’s definitely room for improvement, and there’s plenty of technical knowledge I still don’t have. If you have any suggestions, please leave them in the comments — I’d love to know where I can do better. :)
The tutorial below uses Audacity version 2.4.2.
Creating a Podcast Template in Audacity
My podcasts rarely include anything other than voice recordings, but there are always two segments that need audio clips: the intro and outro music. Rather than hunting down those files every single time, you can save a template so you just need to reposition the outro each episode.
The setup is simple. Open Audacity, go to File > Import > Audio, and drag both your intro and outro into the same project. Roughly position them (as shown below), then go to File > Save Project > Save Project As and name it whatever you like.
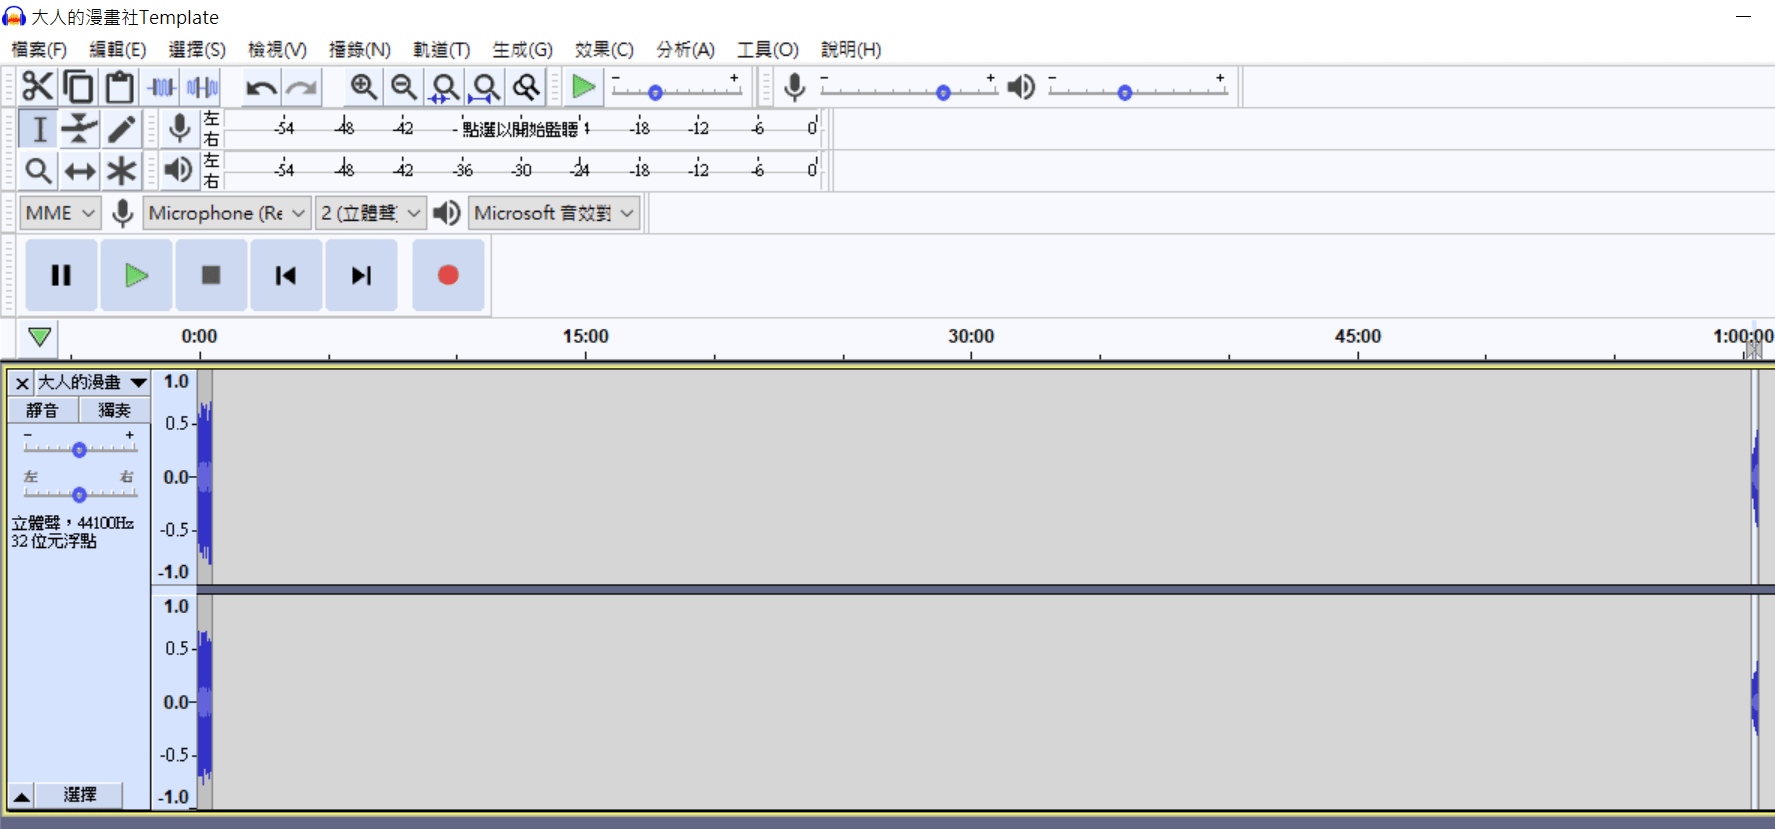
From then on, whenever you record a new episode, just open this .aup file, import your voice recording, and you’ve already skipped a few steps. :P Just remember: if the episode runs longer or shorter than usual, you’ll need to slide the outro to the right position.
Setting Up an Audacity Macro Chain
Once all your audio is imported, there are still a lot of sound quality details to handle. Some people apply effects one by one from the Effects menu — but you can actually set up a macro chain to do it all in one click, then fine-tune from there.
I referenced several articles while building my macro (sources listed at the bottom of this post) and landed on a quick-and-practical chain. Here’s how to set it up step by step.
Step 1: Create a New Macro
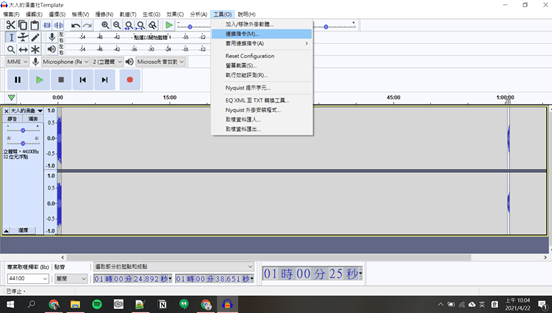
Go to Tools > Macros.
In the left panel, click Add and give your macro a name (e.g., “Podcast”).
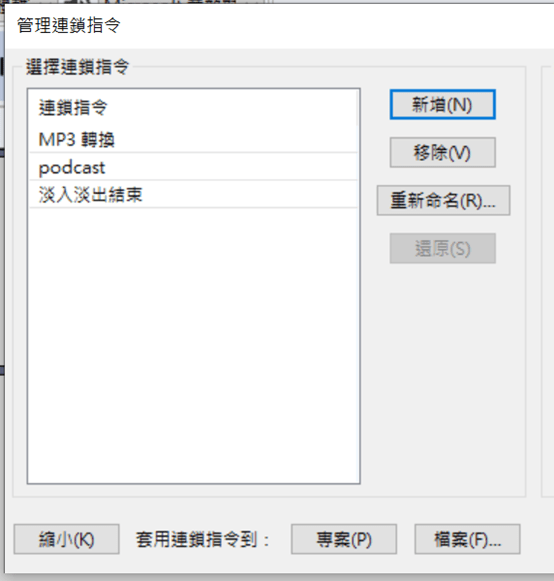
Your macro is created — but don’t close out yet, there’s more to add!
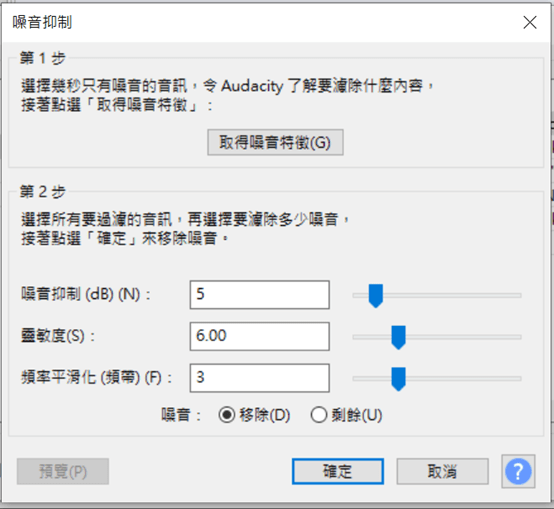
Step 2: Add “Noise Reduction”
Back in the macro interface, you’ll see the right panel showing your editing steps — at this point it should just have a single ”- End -” command. Click Insert, and a list of effects will appear. Find Noise Reduction.
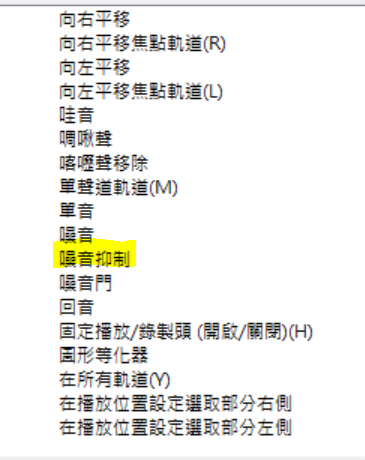
After clicking OK, “Noise Reduction” should now appear as a step. Select it and click Edit to adjust the parameters. Here are the settings I use:
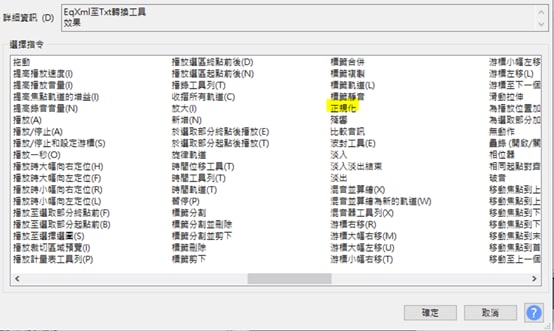
Step 3: Add “Normalize”
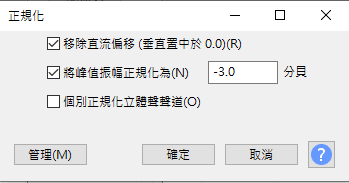
Follow the same process — click Insert in the right panel, and this time find Normalize (it’s roughly in the middle of the list):
Click Edit to adjust parameters. Here are mine:
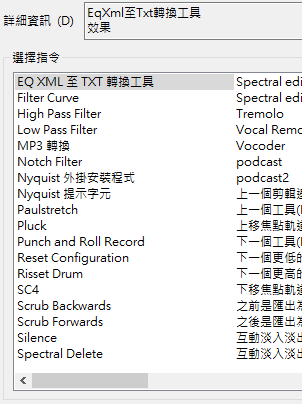
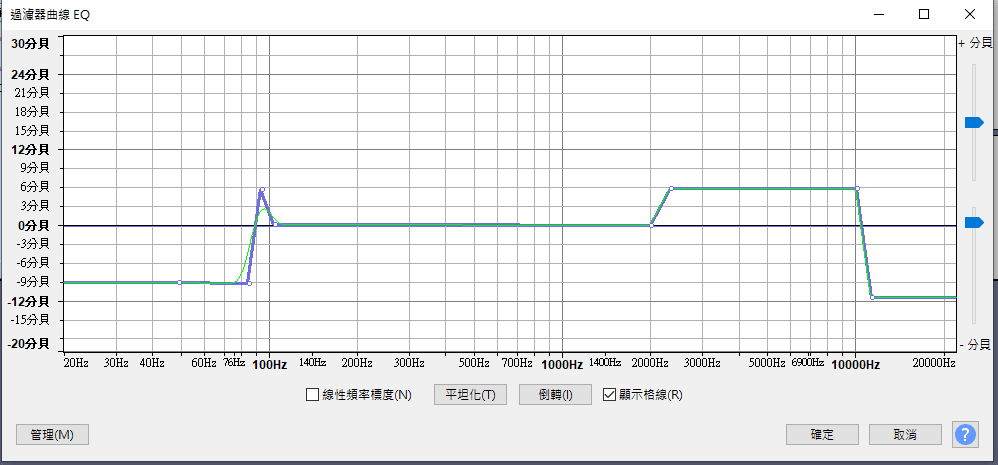
Step 3: Add “Filter Curve”
Find Filter Curve in the list (it should appear near the top).
I’m following settings I found in other tutorials here:
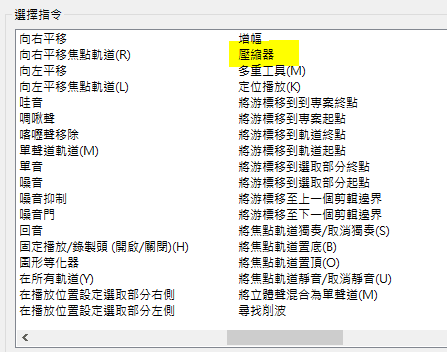
Step 4: Add “Compressor”
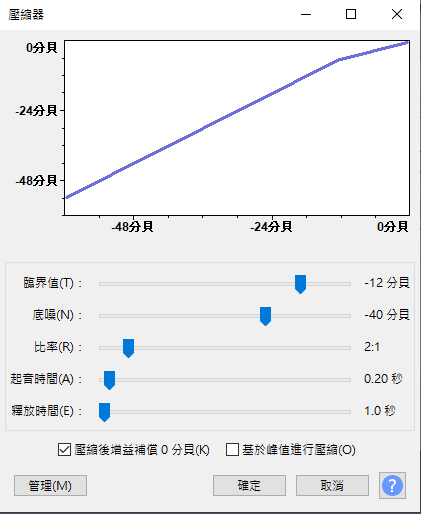
Find Compressor in the list (roughly in the middle) and adjust the parameters.
Based on the references I consulted, here are the settings I use:
- Threshold: -12 dB
- Noise Floor: -40 dB
- Ratio: 2:1
- Attack Time: 0.20 seconds
- Release Time: 1.0 seconds
Step 5: Add “Normalize” Again
Insert another Normalize step with the same parameters as before. That’s the full chain — setup complete!
Step 6: Apply the Macro
Once everything is configured, here’s how to use it: Select the audio you want to process (I usually select all), then:
Tools > Apply Macro > select the macro you named
Give it a moment to process, and you’re done. :D
References
I’m very much a beginner when it comes to audio processing, and I’m genuinely grateful to the many people who’ve shared their knowledge online. Here are the resources I referenced:
“How to use Audacity Templates to Save Time in Podcasting” “科技女伶 Toolbox. 4 — 剪輯音檔的開源選擇 Audacity (下)” “Audacity後製音檔步驟和巨集(Macro)設定”
Thanks for reading :D
If you enjoyed this post, feel free to click the coffee button in the lower right to support us and give Lottery a can 🐾
Comments