10 PPT Activities for Online Teaching (4): Spin Wheel
This post covers the Spin Wheel activity from the '10 PPT Activities for Online Teaching' series. Use it for cold-calling, Monopoly step counting, random topic selection, and more — add a trigger animation for an on/off switch effect.
Before diving in, I’d recommend reading the first post in this series, which covers the overall goals and things to keep in mind for online teaching activities.
For all online teaching activity content, visit the Online Teaching Resource Hub, which includes all interactive PowerPoint templates, Google tools, and other useful resources.
What’s the Point of a Spin Wheel as a Teaching Activity?
I’m sure everyone knows what a spin wheel is for — anything that involves randomness can be handled with one. There are plenty of online tools that include timers and spin wheels, like the ones covered in Teacher Lian Yuren’s video Classroom Gadgets Roundup: Classroomscreen. But if you want to stay entirely in PowerPoint without switching apps, this animation is really handy.
At its core, the wheel’s job is:
- Random selection
Whatever you’re picking — numbers, names, topics — the wheel has you covered.
The following sections walk you through how to build a spin wheel from scratch. You can also just download the template directly (click here to download; if you can’t open it after downloading, see this guide). Building it from scratch actually takes about five minutes (the part that takes me the longest is the visual design XD).
The template comes with three variations: one where the pointer spins, one where the wheel itself spins, and one where a ball moves. The first two use the same animation technique — but the spinning-pointer version requires a bit more setup, so I’ll use the spinning-wheel version to explain things here.
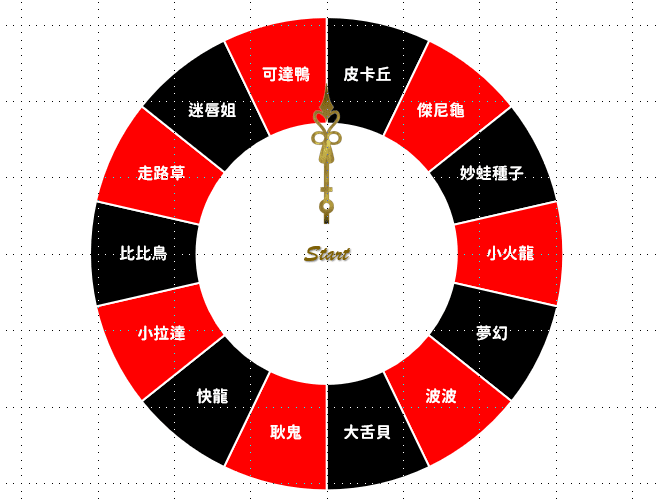
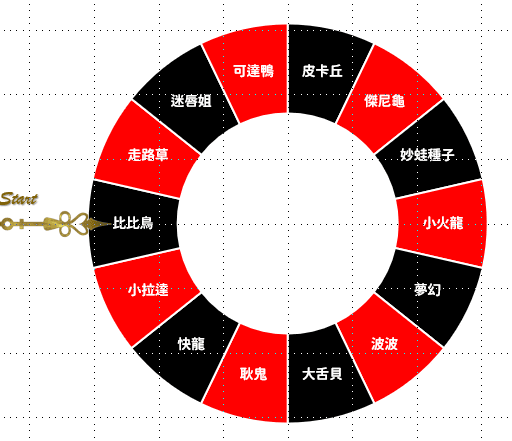
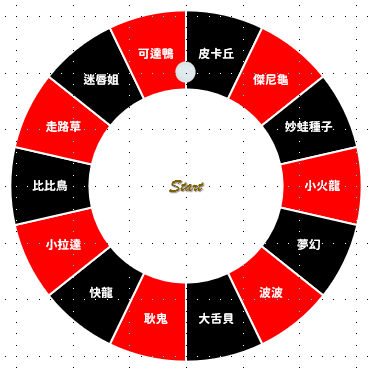
The third variation mimics the feel of Russian roulette, using a “Motion Path” animation instead. Feel free to try it out yourself.
Software used: PowerPoint 2019 (this activity is compatible with older versions of PowerPoint — if you run into any issues, feel free to leave a comment)
Template font: Genshin B (free font — click here to download from GitHub)
From Scratch: Building a Spin Wheel in PowerPoint
Making a spin wheel is surprisingly simple — you can finish it in under five minutes.
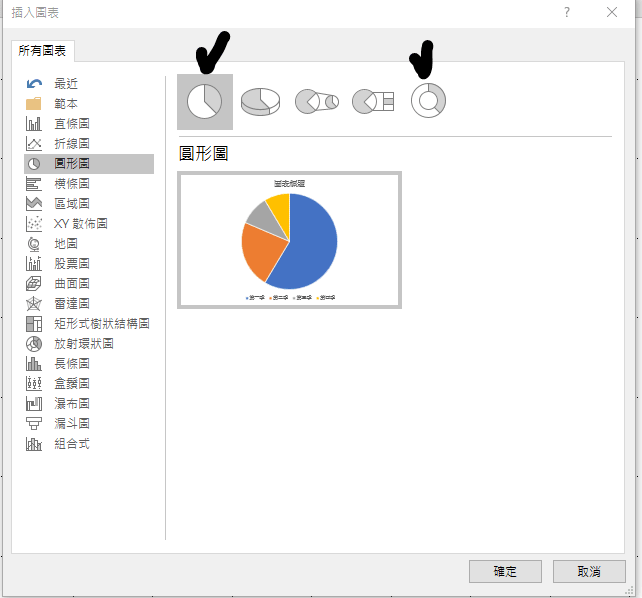
Step 01: Draw the Wheel
There are lots of different wheel styles, but I recommend going to Insert → Chart and choosing a Pie chart. The first and last pie chart options both work well (I’ll demo the last one, which has a nice Russian roulette look XD).
Step 02: Insert Text
After inserting the chart, a spreadsheet-like panel will pop up immediately. Let’s zoom in:
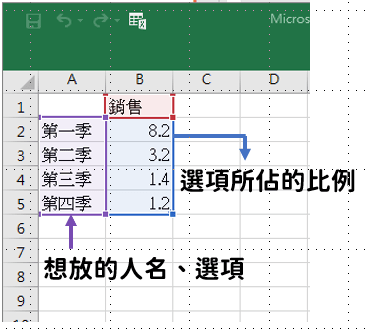
Think of “Q1,” “Q2,” etc. as your options — the names, numbers, or whatever you want on the wheel. You can edit them directly here. I’ll change these to whatever I need.
The “Sales” column controls how much of the pie each option takes up (as a percentage).
Once you’ve entered your options, here’s how to work with the percentage column:
Equal percentages in all cells → equal probability for everyone
No matter what value you enter, as long as all cells in the Sales column have the same value, every option takes up an equal slice of the wheel:
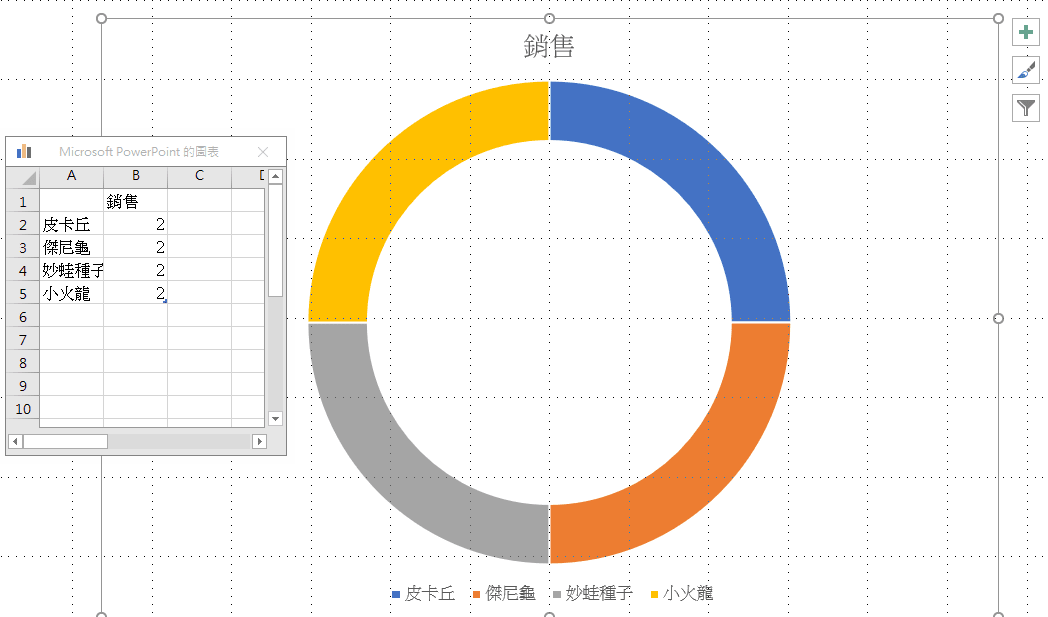
This gives every option an equal chance of being selected, no matter how many times you spin.
Unequal percentages → weighted probability
Sometimes you want unequal odds — for example, in Monopoly, you might want a 6 to be the hardest step to roll and a 1 to be the most common:
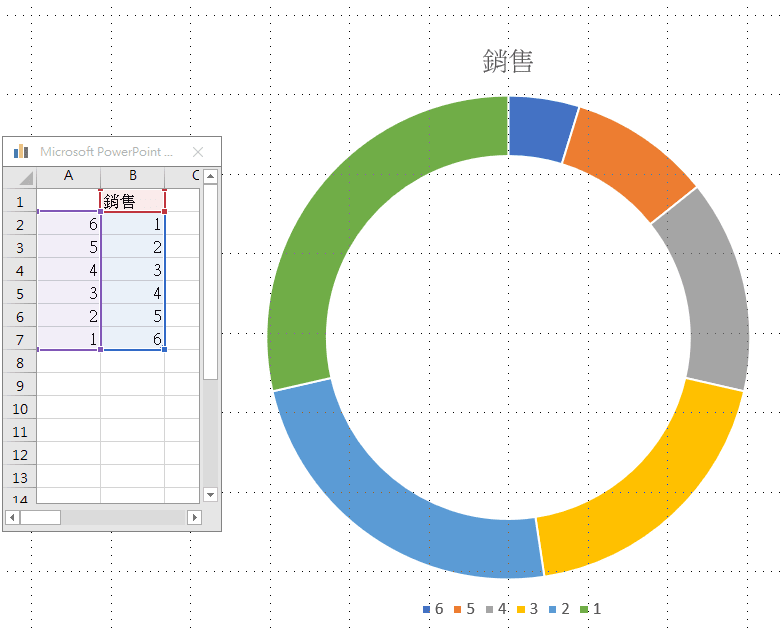
With this setup, 6 will visibly appear less often than 1 when spinning.
Step 03: Customize the Wheel’s Style
There are a few style options you can change — some are necessary, some are optional. I’ll walk through them below.
Showing labels on the wheel (required)
We need the options to actually appear on the wheel, and we also want to get rid of the ugly default chart title. Here’s how:
Click the chart, and you’ll see three icons appear in the upper right. Click the top one — the green +.
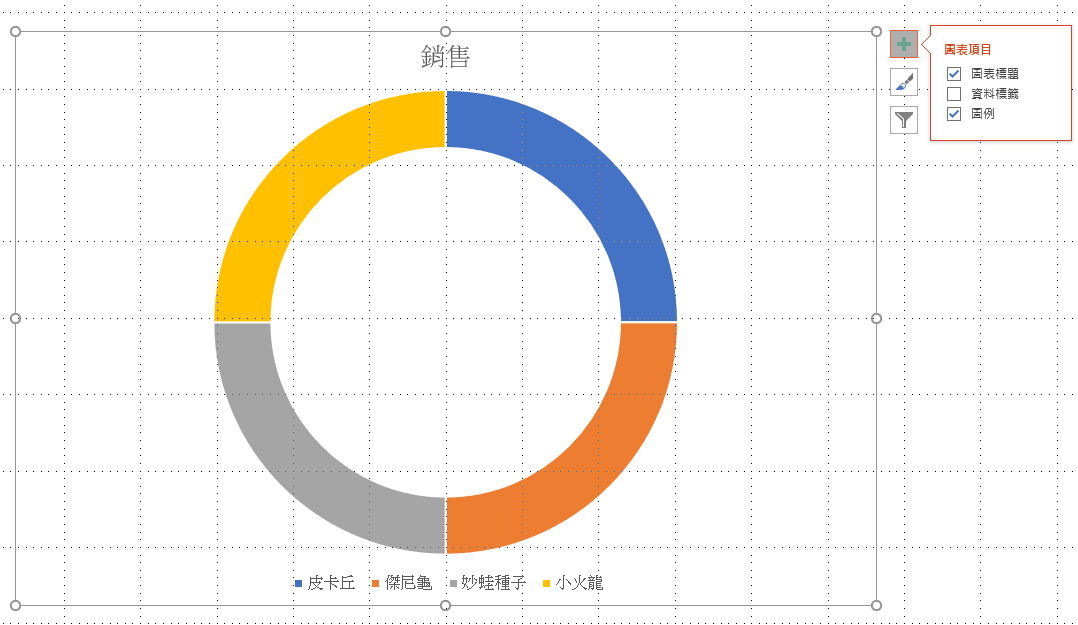
In the menu that appears, change the checkboxes so they look like this:
□ Chart Title
✓ Data Labels
□ Legend
Then click on “Data Labels” — a small arrow will appear on the right. Click “More Options.”

The Format Data Labels panel will open on the right side. Under “Label Contains,” check only “Category Name” — and you’ll see your options appear on the wheel!
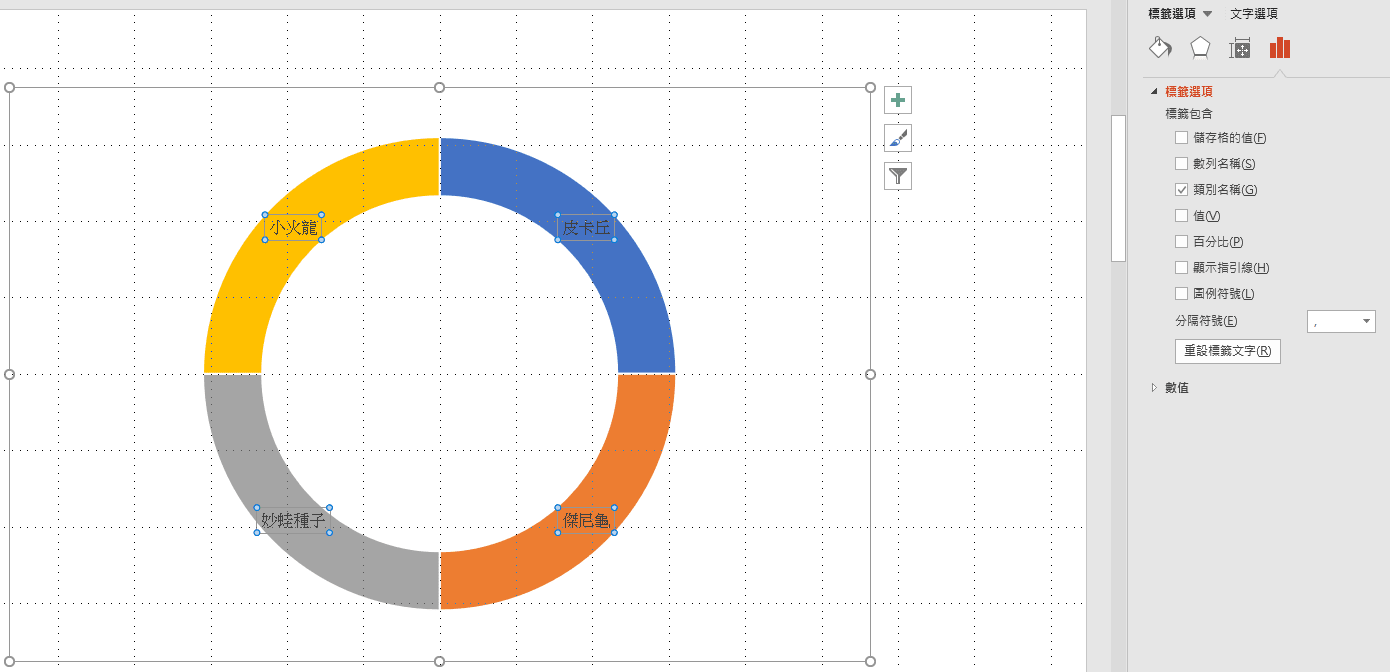
That’s most of the setup done!
Changing text on the wheel (optional)
You can adjust the text inside the wheel just by clicking on the section you want to edit (or selecting all) and changing it the normal way.
Changing wheel colors (optional)
You’ll notice I deliberately used black and red in my template to mimic the look of a roulette wheel — but all of these colors are fully customizable!
Just click the section you want to recolor and change the fill to whatever you like.
Changing wheel options
See the final section on editing the template below.
Step 04: Add the Pointer
The steps above apply to both template variations, but here’s where they diverge:
Do you want the pointer to spin, or the wheel to spin?
The animation technique is the same either way — but making the pointer spin is a bit more involved, so I’ll explain the concept using the spinning-wheel approach here. If you’re interested in the spinning-pointer version, feel free to leave a comment and ask.
Download your pointer image and place it on the slide wherever you’d like it to appear.
Step 05: Set Up the Animation
Now for the spin animation.
What we want: the wheel (or pointer) rotates 360 degrees, then stops when you click — showing the current position.
From the 3+1 animation toolkit (review the 3+1 concept here), we need the Spin effect from Emphasis animations, plus the Appear effect from Entrance animations.
First, select the element you want to spin (wheel or pointer), then go to Animations → Add Animation → Emphasis → Spin (labeled “Gyroscope” in some versions).
Open the Animation Pane, right-click that animation, and choose Effect Options. Under the Timing tab, change the Duration to under 1 second — this makes the spin feel faster.
Also change Repeat to Until Next Click.
Next, select the same spinning element, go to Animations → Add Animation → Entrance → Appear.
Now run the slideshow — you’re done!
Additional Notes
If you want to add an on/off switch (like I have in my template), you can use the “Trigger” technique covered in 10 PPT Activities for Online Teaching (1): Multiple Choice.
As for making the pointer spin — it’s doable, but PowerPoint’s Spin animation always rotates around an object’s center point. I’d recommend using a shape like a “pen” or “finger” pointer instead, since those look more natural when spinning from the center.
If you want something that truly looks like a clock hand moving — you’ll need to add a transparent object to effectively shift the rotation center. Curious how that works? Feel free to ask anytime.
Using the Template: Spin Wheel in PowerPoint
Download the template below first (if you can’t open it after downloading, see this guide):
After downloading, you’ll see three slides — the only difference between them is the visual style.
There’s only one thing to edit: click the wheel, and you’ll see Chart Tools appear in the top toolbar. Go to Design and find Edit Data:

From there, you can edit all the options to whatever you need.
There are many different types of random-selection tools out there — the spin wheel is just one of them. I’ll introduce other variations in future posts!
I hope this has been helpful.
If you have any questions, or there’s an activity you’d like to learn, feel free to leave a comment anytime!
For all PowerPoint-based online teaching activities, see:

10 PPT Activities for Online Teaching (13): Lottery Adventure RPG
Iju Hsu · 2021/06/28 · 12 comments
This post covers the “Lottery Adventure RPG” from the 10 PPT Activities series — a pixel-art style adventure game woven into course content that gives students the feeling of clearing stages.

10 PPT Activities for Online Teaching (12): Snakes and Ladders (with myViewBoard)
Iju Hsu · 2021/06/24 · 5 comments
This post covers “Snakes and Ladders” from the 10 PPT Activities series — combining slides with myViewBoard, it’s a great group competition activity made more exciting by the element of chance.
Thanks again everyone — wishing you smooth sailing with online teaching!
Thanks for reading :D
If you enjoyed this post, feel free to click the coffee button in the lower right to support us and give Lottery a can 🐾
Comments